# Get Started With Callisto Bridge

## Introduction to Callisto Bridge
Callisto Bridge connects Callisto Network and the supported blockchain platforms allowing the swap of native coins and tokens from one chain to another.
The assets transferred via Callisto Bridge are not moved but rather “frozen” on the native blockchain via a smart contract. Then, an equal amount of new tokens are created on the receiving blockchain.
Real assets back the wrapped tokens on public addresses, so anyone can verify that a 1:1 ratio is met.
### Supported Networks:
* Callisto Network
* Binance Smart Chain
* Ethereum
* Ethereum Classic
* BitTorrent Chain
***Note:** The bridge does not charge any conversion fee. However, you will have to pay the network transaction fees for both the origin and destination blockchains.*
### Before Getting Started
Before starting transferring assets via Callisto Bridge, you need to:
* Own the native coins of both blockchains to cover the transaction fees.
* Set up Metamask for Callisto Network and the network you want to transfer the assets with, a guide is available [here](https://soy-finance.gitbook.io/soy-finance/tutorials/set-up-metamask-for-callisto-network).
* Add the tokens to your wallet to see your funds in the graphical interface (see the last section of the guide).
## Transferring Assets Via Callisto Bridge
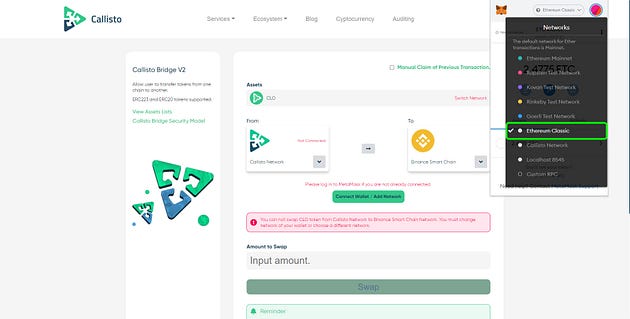
**1.**Navigate to [Callisto Bridge](https://callistobridge.netlify.app/) and select the network from which you want to transfer the coin, “*Ethereum Classic”* in the example.
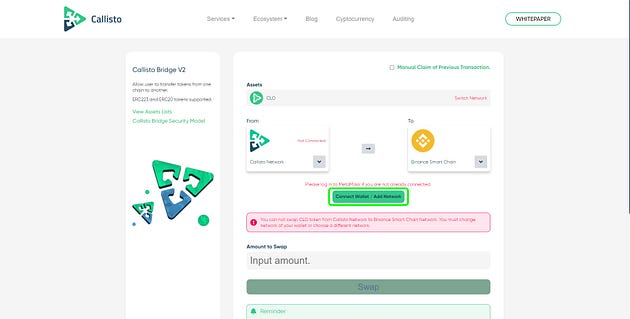
**2.** Click on “*Connect Wallet / Add Network*”.
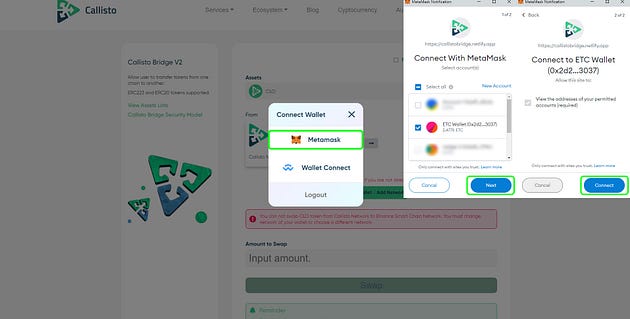
**3.** Now you have to connect your wallet to Callisto Bridge, by following these steps:
1. Select “*Metamask*” in the Connect Wallet menu.
2. A Metamask pop-up window will appear, choose the wallet you want to connect to, then click “*Next*”.
3. Confirm by clicking on “*Connect*”.
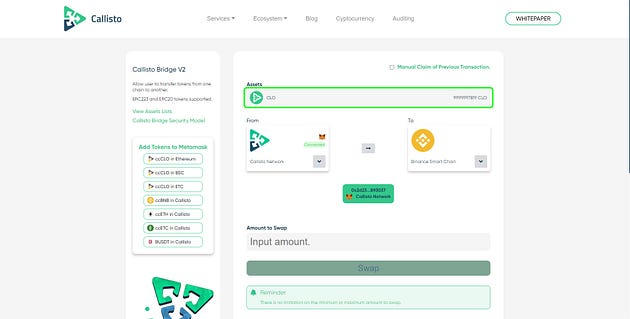
**4.** Click on the “*Assets*” menu to see the available assets.
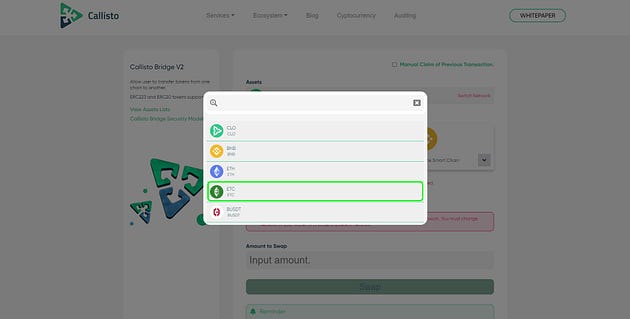
**5.** Select the asset you want to transfer, for the purpose of this guide we will choose “*ETC*”.

**6.** To transfer your assets, you must select the origin and destination networks. Here we will choose “*Ethereum Classic*” on the left (origin network) and “*Callisto Network*” on the right (destination network).
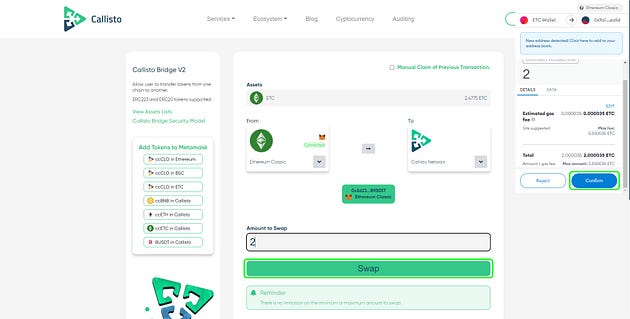
**7.** Enter the amount of asset you want to transfer, click on “*Swap*” and confirm the transaction on Metamask.
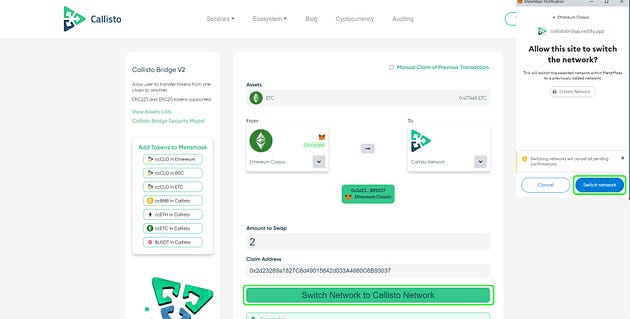
**8.** Once the transfer is complete you should switch to the destination network, Callisto Network in our case, to claim your wrapped tokens.
Click on the “*Switch Network*” button and confirm in Metamask by clicking on “*Switch network*”.
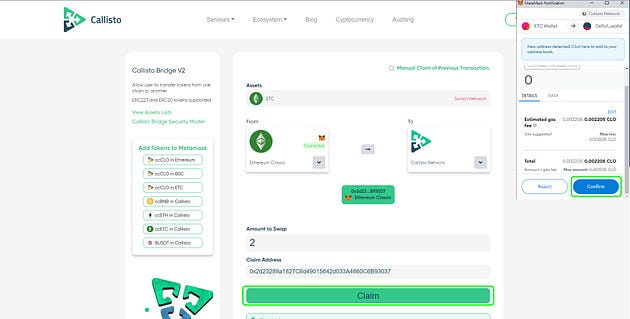
**9.** Click on “ *Claim*” and then confirm in Metamask.
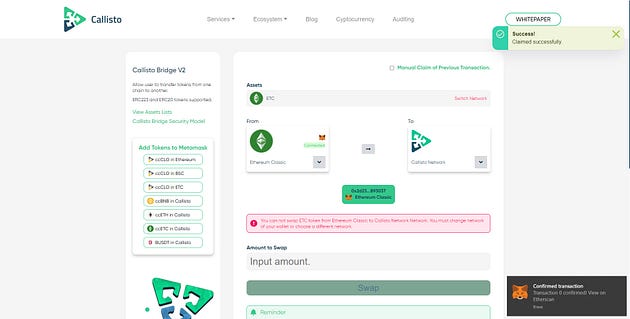
**10.** Congratulation, your transaction is confirmed!
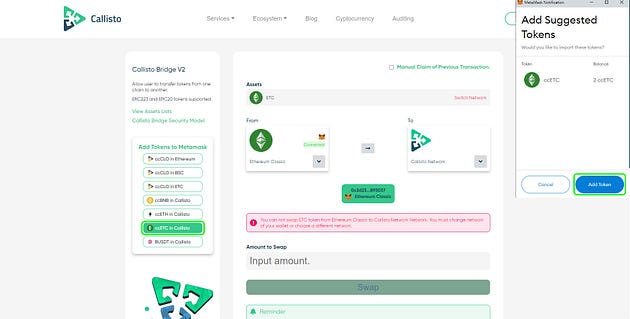
**11.** To view your tokens in Metamask, click on the corresponding button in “*Add tokens to Metamask*” and then confirm by clicking on “*Add a token*” in Metamask.
## Transaction Manual Claim
The transfer operation to the destination blockchain may fail, and then the tokens/coins are not transferred.
In this case, following the procedure below is required to finalize the transfer.
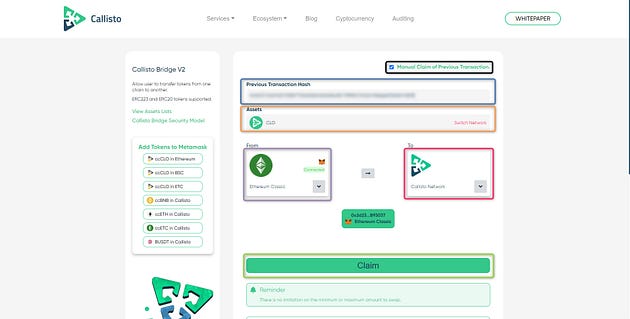
1. Check the “*Manual Claim*” case (in **black**).
2. Paste your transaction hash in the dedicated field (**blue**).
3. Select the asset you are transferring (**orange**).
4. Choose the origin network (**purple**).
5. Choose the destination network (**pink**).
6. Click on “*Claim*” to finalize the transfer operation.
📌 If you experience any difficulties during the process, please join our community on Telegram:
*
*
[
](https://soy-finance.medium.com/?source=post_sidebar--------------------------post_sidebar--------------)